
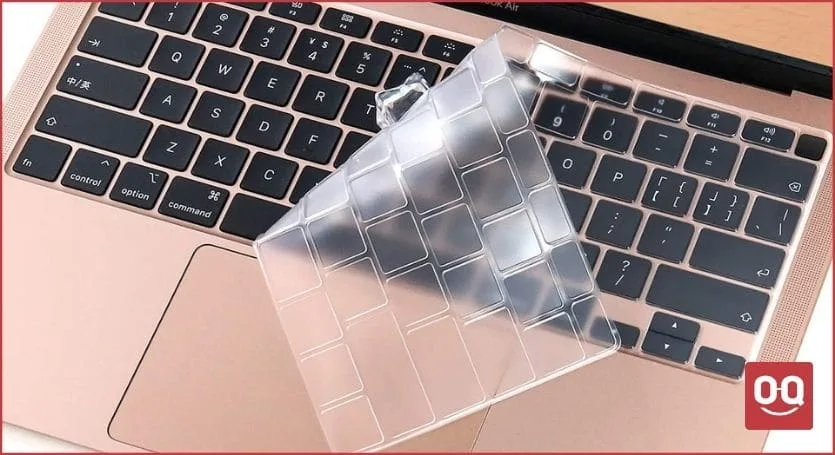
The computer keyboard is one of the most important pieces of technology that is being used every day. And nowadays they are also very expensive. Therefore, if you have an expensive and high-quality gaming or working keyboard, you should take proper care of it. You need to protect it from dust, moisture, and scratches. And you can do this by using a silicone keyboard cover.
If you have never used a silicone keyboard cover, you may be wondering what is it and how it works.
A silicone keyboard cover is a protective that provides protection against scratches and dings. It can even protect your keyboard from being damaged by accidental water spills. These covers are also known as keyboard skins because it gives your keyboard a new look.
Usually, people who use expensive laptops or keyboards use a silicone keyboard cover to protect the keyboards from dust, dirt, and any kind of liquid entry. But do you know how to make a silicone keyboard cover at home?
Learn: Why Laptops are More Expensive Than Desktops?
Today in this article, I will show how you can easily make a DIY silicone keyboard cover at home, without having to buy any expensive tool or equipment. We will also discuss some other factors that you should know before using a silicone keyboard cover.
However, if you don’t want to go through the whole process then you can get a keyboard cover from HERE.
Why should you use a silicone keyboard cover?
You may never have considered keyboard covers as a way to protect your keyboard unless you were actually faced with a problem. There are so many benefits of using a silicone keyboard cover. Here I am mentioning a few of them.
1. Prevents accidental spills
A silicone keyboard cover is completely waterproof. It doesn’t have crevices or holes that allow water or liquids to enter. Therefore, when you place it over your computer or laptop keyboard, your keyboard will be safe from accidental liquid splits. So, if you are used to drinking water or any liquid when working, you should definitely use a silicone keyboard cover.
2. Keeps your keyboard dust proof
Dust and dirt can damage your keyboard and make the keyboard switches ineffective. Plus it is next to impossible to clean those tiny spaces. By using a silicone keyboard cover, you can easily stop dust from entering the keyboard without being worried about damaging it. It will always keep your keyboard surface dust-proof and clean.
Read: How to Keep a Keyboard Clean?
3. Get rid of moisture and oily keycaps
During the winter when temperatures are cool and the air conditioning is too strong in your room, the moisture can be excessive. The keycaps feel slippery, which leads to more typing errors. But using a silicone keyboard cover, you can tackle that. The cover will prevent moisture from reaching the keys.
In addition, a silicone cover can prevent your oily hands from damaging the keycaps’ texture. Even if you use your keyboard with dirty hands, the cover will protect the keycaps from getting dirty.
4. Your keyboard looks new
Over time, Alphabets on the key fade away when you use them for a long time. Also, the keyboard looks old and feels uncomfortable. In these cases, using a silicone keyboard cover can keep your keyboard look always new and fresh. It is the best protection against external and internal damage.
Learn: Can You Use a Lower Wattage Charger?
How to make a silicone keyboard cover?
You can certainly make your own keyboard cover if you are thinking of being a little creative, although they aren’t too expensive. Follow the steps to make a silicone keyboard cover at home.
1. Gather necessary materials
First of all, you have to gather all the materials that are going to need for this project. Make sure you gather the following equipment –
- A scale
- A pen
- Liquid Silicone
2. Take your keyboard’s measurements
After you have gathered everything you need, the next step is to measure your keyboard’s length and width for the cover mold. This step is very important. Therefore, you should ensure that you don’t make a mistake while measuring. Take the measurements using a scale.
Read: Best Premium Looking Gaming Laptops
3. create the keyboard mold
Now you have to make a mold with the measurements you took in the previous step. There are multiple methods of creating a mold. One of them involves forming the mold from a material that hardens, like clay. Take your keyboard and place it on the clay to shape the mold.
If you don’t have clay, take a large bowl and make the mold inside it using barriers.
4. Prepare the mixture
Preparing the silicone mixture properly is very important. If you don’t have liquid silicone at home then you can easily purchase a bottle of liquid silicone online.
Most liquid silicones come in an already usable form, but some might include a few packets that you’ll have to mix together. Read the instructions first before mixing the material. Also, make sure you use a wooden stick or spoon to mix the material properly and avoid making any air bubbles.
Read: Best Ergonomic Laptop Backpacks
Prepare the mixture carefully, otherwise, the final product won’t be that good.
5. Fill the mold with the mixture
In this step, you have to fill the silicone mold that you have created with the silicone mixture.
You need to pour the mixture carefully. You need to make sure you pour each drop of the silicone mixture properly and spread it all over the mold. Otherwise, you might mess up the final product, which can be very frustrating.
Now cover the mold with something and let it rest for at least 10 hours so that it can dry properly.
6. Take the keyboard out
After the mixture has dried up properly, you need to take the cover out carefully. Then you need to trim excessive edges, shape it according to your keyboard, and ensure that it fits perfectly on the keyboard.
Also Read: How to Prevent Laptop Hinges from Breaking?
https://www.youtube.com/watch?v=rcZiQJFOA24
How to clean a silicone keyboard cover?
Since a silicone keyboard cover protects your keyboard from dust and dirt, it gets dirty very easily. Therefore, you should clean it regularly.
However, cleaning a silicone keyboard cover is pretty straightforward. As it does not include electronic parts, it can be washed or cleaned with water and detergent. Follow the steps below to clean your silicone keyboard cover easily.
- First of all, remove the silicone cover from your keyboard and dust off all dust particles and crumbs from it.
- Pour lukewarm water into a bowl or fill your kitchen sink because cold water might leave cracks on the cover. But make sure that the water isn’t too hot.
- Add 1 tablespoon of detergent to the water and mix it properly.
- Now submerge the silicone keyboard cover in water and leave it for 10 minutes. Then rub the cover and remove all dust particles from the cover surface.
- Once you have removed all the dust particles from the cover, lay it flat on a towel and gently wipe the soapy water out from its surface.
- Make sure the cover is dried properly before sticking it on the keyboard again.
How to make a silicone keyboard cover stick?
When moving your laptop or keyboard, sticking the silicone keyboard cover will prevent it from falling off. There are so many different methods that you can apply to make your keyboard cover stick. Here I am going to mention a few of them.
1. Clean the keycaps
One of the main reasons that prevent a silicone keyboard cover from sticking to the keyboard is that there are so many dust particles on the keycaps. So, if you keep your keyboard clean, the cover will stick to the keyboard entirely.
Read: How to Clean Dust From Laptop?
Clean the surface of your keyboard thoroughly using a microfiber cloth. After removing all the dirt from the keyboard surface, you need to get your hands clean, or else the keycaps will again get dirty.
2. Apply adhesives
Applying adhesive or glue is another easy way to make your silicone keyboard cover stick on the keyboard. apply it very carefully and make sure all parts have properly adhered to the adhesive. Then use a flat and hard material like a card for stretching the cover.
3. Use double-sided tape
You can easily make your silicone cover stick to the keyboard by using double-sided tape. Stick a small strip of tape on the key and place the cover on it. However, it may leave marks on your key but you can clean it easily.
Alternatively, you can even use scotch tape. It won’t leave any mark on the keyboard but may look a bit messy.
Conclusion
Everyone wants to keep their keyboard clean. But cleaning and maintaining a keyboard is pretty tough since there is always a chance of damaging the keyboard. Also, you cannot use liquids directly on your keyboard.
Read: Best Laptop Without Bloatware
Don’t worry, if you want to keep your expensive keyboard clean and dust-free, using a silicone keyboard cover can be a great option. In terms of protection, silicone is a superb material that can prevent anything from piercing it, so your keyboard dust won’t accumulate inside your keyboard. Furthermore, a silicone keyboard cover can be easily cleaned and managed.
In addition, a silicone keyboard cover is very cheap and you can use it until it finally tears apart. However, it is also possible to make a silicone keyboard cover at home.
In this article, I have described step-by-step how to make a silicone keyboard cover at home. If you follow the steps mentioned above, you will be able to make a high-quality silicone cover for your keyboard. If you want to save some money then making your silicone keyboard cover can be a great option.
Thanks for reading the article, I hope you learned a lot.